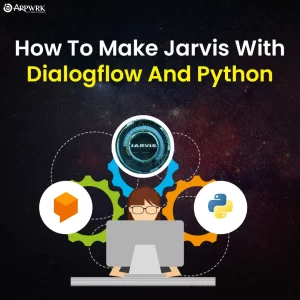
How To Make Jarvis With Dialogflow And Python – APPWRK
Are you one of those who have always dreamt of having an AI-powered virtual assistant like Jarvis? Well, guess what, dreams do come true! With the advancements in technology, creating your very own Jarvis is now a reality. And in this blog, we’re going to show you how to make jarvis with dialogflow and python.
First let’s understand who is jarvis and more about this world-famous virtual assistant. Jarvis is a fictional character that functions as an AI virtual assistant in a popular film and the jarvis full form is ‘Just a Rather Very Intelligent System’.
Next, let’s move on to breaking down how to make jarvis ai with python code and dialogflow. In order to build jarvis voice assistant with python code, using tools like Dialogflow can be extremely instrumental. Dialogflow is basically a conversational platform that lets developers build chatbots and voice assistants that can understand human language like a pro. It’s a super user-friendly tool that uses natural language processing, machine learning, and voice recognition to make sure your virtual assistant can hold a decent conversation with you.
Now, combining the awesomeness of Dialogflow with the flexibility of Python, you can create a conversational AI agent that can handle a ton of tasks. From answering your questions to giving you recommendations or even controlling your devices. And the cherry on top? You can communicate with your Jarvis through both text and voice! So, let’s get cracking and learn how to create your very own Jarvis-like virtual assistant using Dialogflow and Python. 🤖💬🐍
Table of contents
Step 1: Create a Dialogflow agent
Alrighty, let’s kick off this Jarvis-making process! If you are wondering how to make your own ai assistant like jarvis, then the first step you need to take is to create a Dialogflow agent, which will be your very own virtual assistant. It’s super easy to do, and we’re gonna show you how.
First off, head over to the Dialogflow console and log in using your Google account (you do have a Google account, don’t ya?).
Once you’re in, create a new agent and give it a kick-ass name, like ‘Jarvis’. Make sure to choose the default language and time zone, and then hit that ‘Create’ button.
Boom! Agent created. Now, you’ll be taken to the agent’s dashboard where the real fun begins. 🤖💬
Step 2: Design the Conversation Flow
Let’s make this baby talk! When you are programming jarvis, it is highly important to design the conversation flow and give your virtual assistant some serious chat skills.
To get started, you’ll want to click on the ‘Intents‘ tab (it’s over there on the left-hand side of the dashboard). From there, you can create a whole bunch of different conversation ‘intents’ for your assistant to handle.
It’s like giving your digital buddy a whole new set of superpowers! Just hit the ‘Create Intent‘ button and let your imagination run wild. Give your intent a cool name (something like ‘greeting‘), and then define all the different ways that users can start chatting with your assistant (howdy, yo, what’s up?).
When you’re happy with your masterpiece, just save your intent and move on to the next one. Easy, isn’t it?
Step 3: Enable Webhook Fulfillment
Alrighty, now it’s time to bring your Dialogflow agent to life with some webhook fulfillment! Here’s the lowdown on step three of this wild ride:
Hit up that ‘Fulfillment‘ tab over yonder on the left-hand side of your dashboard. You can’t miss it!
Toggle the switch that says ‘Webhook‘ to get that sweet, sweet webhook fulfillment up and running. Don’t be shy, give it a little click.
Here comes the magic part: enter the URL of your webhook script (you know, that Python script you will be working on). Just copy and paste that bad boy into the field and you’re good to go!
Now that you’ve got webhook fulfillment enabled, your Dialogflow agent will be able to process user requests like a champ. And with your Python script at the ready, there’s no limit to what you can achieve! 🚀
Step 4: Write the Python script
Alright, we’re almost there! If you are eager to learn how to create jarvis, then this is the final step that you will have to follow. In this step, you need to write the Python script that will handle user requests and send back responses. Here’s how you can get started:
To create jarvis with python code, first we will have to import the necessary modules. In this case, we’ll need Flask (for our web application) and request and jsonify (for handling HTTP requests and responses).
Once we’ve got our modules sorted, we can create our Flask app by instantiating a new instance of the Flask class. Make sure to give it a name that’s easy to remember (we’ve gone with ‘app’ for simplicity’s sake).
Next, we need to define a new route for our application that will handle incoming requests. We’ll use the @app.route decorator to do this, specifying the URL endpoint we want to listen to (in this case, ‘/webhook’) and the HTTP method we want to use (POST).
Inside our webhook function, we can extract the JSON payload from the incoming request using request.get_json(). This will give us access to all of the information we need to generate a response.
Once we’ve got the payload, we can print it out to the console (just for debugging purposes) and start generating our response. For this example, we’ve kept it simple and just returned a static message (‘Hello from webhook’), but you can modify this to generate a more dynamic response based on the user’s input.
Finally, we need to run our application using the app.run() method. This will start a local server that will listen for incoming requests at the specified endpoint.
from flask import Flask, request, jsonify

app = Flask(__name__)

@app.route('/webhook', methods=['POST'])
def webhook():
    req = request.get_json(silent=True, force=True)
    print(req)

    res = {
        "fulfillmentText": "Hello from webhook"
    }

    return jsonify(res)

if __name__ == '__main__':
    app.run(debug=True, host='0.0.0.0')
That’s it! With this script in place, you’ll be able to handle incoming requests from your Dialogflow agent and generate responses based on the user’s input.
While learning how to build jarvis in python might seem a little complicated, if you carefully follow the steps listed above you will be able to create a virtual assistant like jarvis ai using python code in no time!
Conclusion – How to Make Jarvis With Dialogflow and Python
So, this was our blog regarding “How to make Jarvis with Dialogflow and Python“. If you liked the blog, do share it with your friends. Let everyone feel the immense pleasure that comes from having your own Virtual Assistant like Jarvis.
Related Links: HOW TO IMPLEMENT DWAVE QBSOLVE IN PYTHON
Frequently Asked Questions (FAQs)
A: Jarvis in Python is a conversational AI agent built using the Python programming language, which can be integrated with Dialogflow to understand and respond to user input using natural language processing and machine learning.
A: Building Jarvis with Dialogflow and Python requires knowledge of natural language processing, machine learning, and Python programming language. Familiarity with Dialogflow, the Google Cloud Platform, and web development is also helpful.
A: To set up a service account for your Dialogflow agent, go to the “Settings” page of your agent in the Dialogflow console, and click on the “Service Account” tab. You can create a new service account and download the JSON key file.
A: To install the Google Cloud Client Library for Python, you can run the command “pip install –upgrade google-api-python-client” in your terminal.
A: In your Python script, you will need to import libraries and modules such as ‘json’, ‘google.oauth2.credentials’, and ‘googleapiclient.discovery’ to work with the Dialogflow API and authenticate your requests.
A: Creating a “Jarvis” in Python involves developing a virtual assistant capable of performing tasks based on voice commands or text input. You can start by using Python libraries for capturing and recognizing voice commands and integrating subprocesses to enable the assistant to interact with your system, such as opening applications or files. For added functionality, you can also use APIs for scheduling, for forecasts, and email libraries for sending emails. By combining these components, you can build a basic assistant that listens, processes, and executes commands like Jarvis”.
A: To build an AI system like Jarvis, developers need to work with APIs and services to handle various tasks, including natural language processing and fetching online data. Libraries like requests in Python can assist in connecting to and managing HTTP requests to external APIs. It is essential to carefully consider the method of natural language processing (NLP) when building AI systems like Jarvis.
Creating an AI system similar to Jarvis requires developers to utilize APIs and services for managing tasks such as natural language processing and retrieving online data. They can use tools like Python’s requests library that are useful for establishing and managing HTTP connections to external APIs. In addition to that, selecting the appropriate natural language processing (NLP) approach is a crucial consideration in the development of such AI systems.
Related Links:
- HOW TO IMPLEMENT DWAVE QBSOLVE IN PYTHON
- How to Send Birthday Wishes Email with Python?
- Top 10 Python Libraries for Machine Learning
- Making Apps with Python-a complete Guide
- Node.js vs Python: Which is best for backend development in 2023?
- ReactJS vs Python: Which Technology is Best For Your Next Project in 2023?
About The Author
