


Introduction
With the App Store generating over $119 billion revenue in just the first quarter of 2024 and amassing 35 billion downloads worldwide, launching an app on the Apple App Store has become a game-changer, regardless of whether you’re an independent developer or a tech-savvy business owner. Publishing an app on the App Store not only helps you get more eyeballs but can also boost your app’s revenue.
However, before submitting an app to the App Store, it’s essential to ensure all the details are in order. From meeting technical requirements to complying with Apple’s guidelines and optimizing your app for listing, these critical factors can make all the difference between a successful launch and unexpected rejection. Needless to say, following an Apple Store App Submission Checklist is vital before submitting an app to the App Store.
Let’s explore the five most important to keep in mind before submitting your iOS app to the App Store.
However, before we get into the nitty-gritty, let’s find out why an app can get rejected on the App Store.
Table of contents
Reasons Why Your App can Get Rejected
Launching your app is exciting, but the review process can present some unexpected challenges. Apple has strict guidelines to ensure that all kinds of apps from utility apps, and entertainment apps to iOS android emulators meet their standards for functionality, content, design, and security.
In 2020 alone, the App Store rejected about 2 million app submissions, including one million new apps and additionally one million updates. Whether it’s technical shortcomings, content violations, privacy issues or unauthorized location tracking in iPhone and other Apple products, there are various reasons your app might get rejected. By understanding the common reasons for rejection, you can address the issues before submitting the app and ensure a smooth approval process.
Listed below are the most common reasons for App Store rejection.
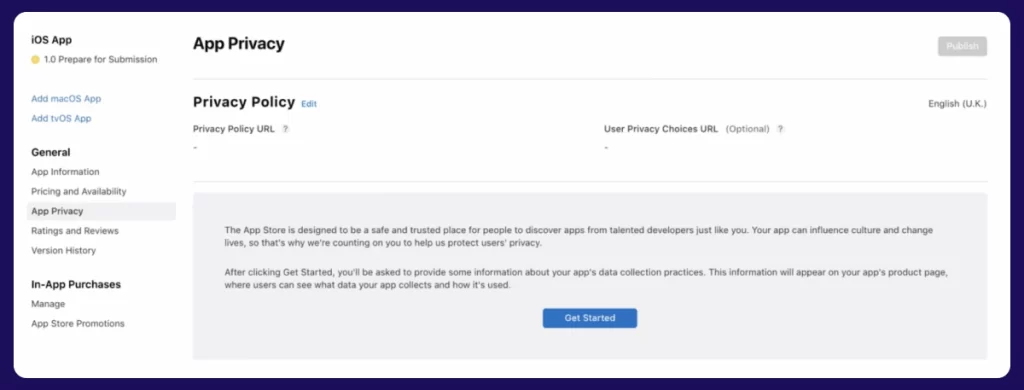
1. Noncompliance with the App Store’s privacy provisions
User privacy is Apple’s top priority, and failing to comply with its privacy provisions can lead to rejection. Not to mention, non-compliance with privacy policies is one of the biggest reasons for app rejection. Whether it’s mishandling users’ data or lacking a transparent privacy policy, non-compliance is not accepted. Ensure that every aspect of your app adheres to Apple’s privacy guidelines, from data encryption to user consent.
Additionally, any user or usage data you collect -even anonymous data- can only be collected with the user’s consent, which they can easily withdraw at any time. Applications that collect user data without consent must ensure full compliance with applicable regulations, such as GDPR.
2. Launching a copycat
Apps that resemble other existing apps, whether in design, functionality, or concept in the App Store, will also be rejected. These so-called copycats frequently take the most popular app available on the App Store, make a few minor changes, and then present their app as a new original idea. To avoid this, you should come up with a unique app concept.
Even if your app idea is original, use creative UI and icon designs to make your app stand out from the competition. Make sure your app’s screenshots, user interface, functionality, and description are unique. Then, search for your app’s keywords and check that your app doesn’t look or feel like them. This will ensure your entry into the App Store.
3. Failing to submit a complete, tested, and compatible app or update
Incomplete and poorly tested apps are one of the most common reasons for rejection. The App Store talks about five areas that are reviewed under the app performance criteria. Let’s talk about them.
- Not submitting in a fully completed application: If the app review team discovers that your app contains several broken links or bugs, uses placeholder text, or lacks metadata, a rejection notice will be issued.
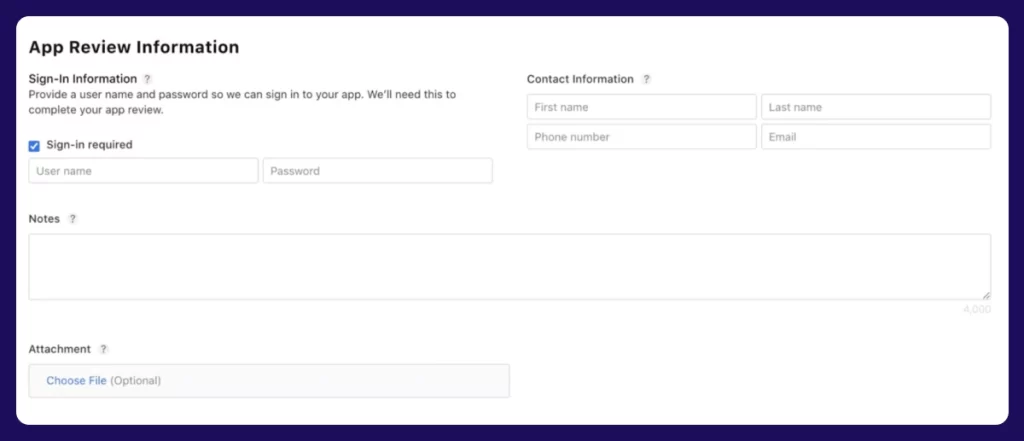
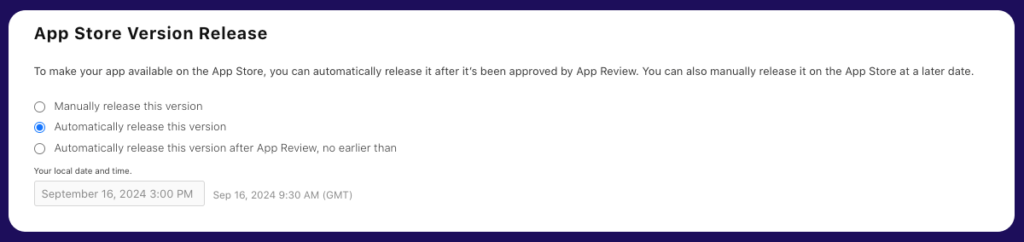
- Getting a “beta” app submitted: If your app is not ready for users, do not submit it to the app review team. The review team for the App Store explains that “trial, beta, and demo versions of apps don’t belong in the App Store.” The review team advises against using beta testers to evaluate your software; instead, use TestFlight. Up to 10,000 beta users are involved in your app’s testing, internal review, and quality assurance procedures using TestFlight.
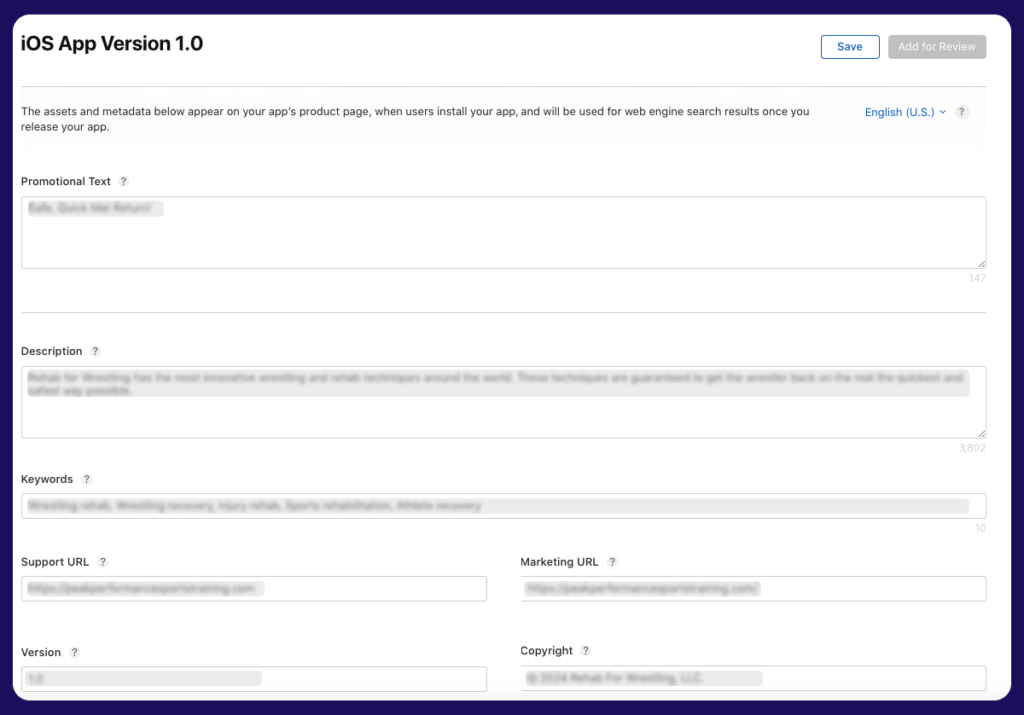
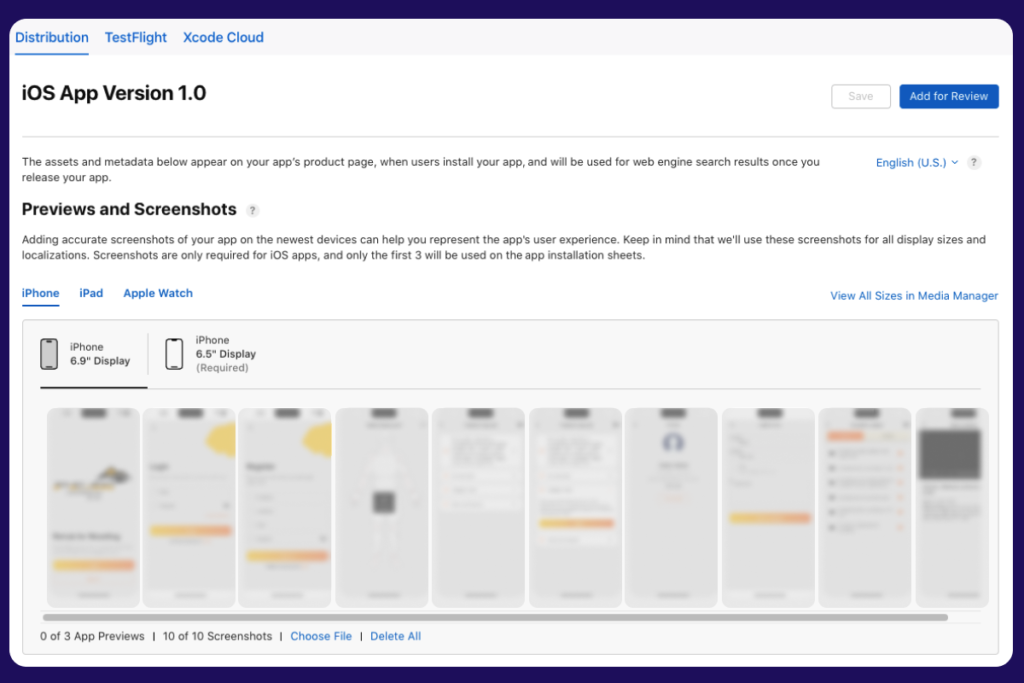
- 100% of the metadata in your app is not filled up: Create a product page for your app using its metadata to provide consumers with all the information they want before downloading or purchasing it. This covers everything, including your privacy statement, an explanation of the main features and functionalities of your app, and even illuminating app previews. It is also necessary to include information about your in-app purchases and app monetization strategies.
- Not making sure the hardware compatibility: Performance optimization should be applied to your program. If your app results in excessive device heating, battery depletion, or resource strain on the phone, you can expect to have your app rejected.
- Not making sure that the program is compatible. A lot of work goes into making sure your app is compatible with other software so that it passes the App Store review process. This includes building your app using only public APIs and approved frameworks, kits, and technologies, adhering to standard UI conventions, and applying best practices for display advertising.
4. Failing to offer a high-value app
Another reason for app rejection can be choosing oversaturated categories. With over 2 million apps on the App Store, picking your niche carefully can impact the app’s approval. If an app does not offer a unique and high-quality experience, it might not get the green light from the Apple App Store. Therefore, before submitting your app, check out the apps in your category and compare them with your application.
5. Committing copyright infringement
If your app uses any copyrighted material, patented ideas, or business-registered trademarks without proper authorization and permissions, your app will be swiftly rejected. Your submission will fail the App Store review. Additionally, apps that mimic other app’s designs and functionalities can also result in a violation of copyright laws. To avoid this, make sure all the content in your app is original or used with permission. If you are unsure about any content in your app, you should seek legal advice to protect your app from rejection.
6. Failing to comply with the App Store’s content guidelines
Apple is known for its strict content guidelines, and even a minor violation can result in app rejection. These guidelines are made to ensure that all apps maintain a high standard of quality and safety. For example, If your app contains content about violence, pornography, and antisocial behavior, such as abuse, racism, or criminal activity, it will be immediately flagged.
Similarly, false information, misleading claims, or apps promoting illegal content are not allowed.
To avoid rejection, make sure your app complies with Apple’s content guidelines.
7. Offering poor in-app purchase experiences
The App Store review team expects transparency regarding in-app purchases. Apps that allow in-app purchases must comply with the App Store’s terms. So, apps with unclear or misleading pricing will not be approved. Your in-app purchases should function without glitches, delivering a seamless user experience for all transactions. In addition, you should clearly communicate to users about the benefits of signing up, especially for recurring subscriptions.
Also read: Complete Guide to Mobile App Development (Process, Types, and Technologies)
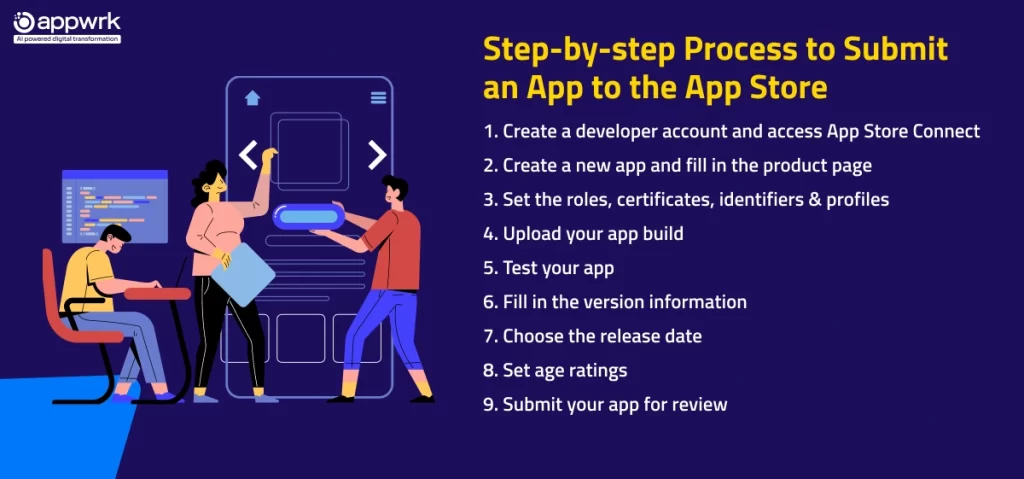
Five Things You Need to Consider Before Submitting an iOS App to Apple App Store
Having a successful launch is not just about creating a great app; it is about making sure your app is compliant with Apple guidelines and rules. It is important to understand that Apple aims to deliver the best mobile app store experience for its users. Before you hit the submit button, there are a few crucial considerations that will help you avoid common pitfalls and ensure a smooth launch. Whether you are submitting a gaming app, e-commerce app or an iOS android emulator, here’s the app store submission checklist that you need to follow.
1. Thoroughly Go through App Store Policies and Guidelines
If you want to get Apple’s approval on the first go, understanding Apple’s guidelines is critical. The Apple App Store has special guidelines and documents explaining the entire publishing process to help developers successfully launch their apps.
Not to mention, Apple is very strict about its publishing policies, and if they are not followed properly, you might face rejection. So make sure to check the App Store’s guidelines thoroughly before app submission.
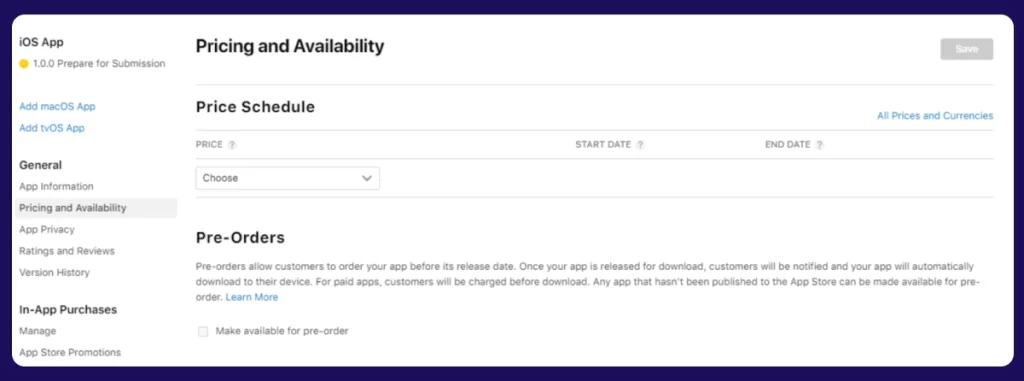
2. Deciding whether it’s a Free or Paid App
One of the most important decisions you have to make is about app monetization policy. You must decide whether to offer your app for free or if the users will be charged a subscription fee.
By far, the most popular strategy is using a freemium model; it is very effective if you plan to attract a huge user base. This model allows users to download the app without any charges, which increases the likelihood of people purchasing premium services to access exclusive features. However, if you are offering services for a niche audience, then it is recommended to have a subscription model.
You can also explore other monetization strategies and choose the one that works the best for your app.
Also Read: How Much Money Can an App Earn in 2024?
3. Extensive Research of Market and Competitors
It goes without saying that conducting market research before your app’s launch can make or break its success. While conducting the research, it is important to identify your competitors. This will help you understand the features, functionality, and market share of similar apps that your target audience is using.
In addition, you will gain valuable insights into market conditions that will help you recognize your opponents’ mistakes and strategies. This will allow you to prevent those mistakes and develop successful strategies for the launch.
4. Conducting the App Testing Before Publishing
Before unveiling your app to the world, ensuring it delivers a smooth user experience is crucial. You should choose a thorough testing process and make sure it meets the basic quality requirements listed on the concerned platform and devices. This phase is where you can catch and eliminate errors, optimize the app’s performance, and refine every detail of the app. It is an important step for your app to clear all quality checks effortlessly.