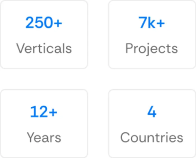
150+ minds across 4 countries. Join a culture of innovation, ownership & growth.
Rewire for AI
From machine learning to deep learning, from classification tools to overall process automation – our AI engineers will help you retool your existing system or enhance your company results.
Ship faster, scale smarter, built for product companies and SaaS teams
Our Latest Work
We strive hard to deliver result-driven digital solutions across the globe. Check out our case studies to get a glimpse of how we ideate, innovate, and create unconventional digital solutions according to the requirements of our clients.
Discover diverse and passionate insights from our tech enthusiasts. We collaborate across various sectors to streamline operations and drive innovation. Explore our rapidly growing collection of articles to see why we’re at the forefront of IT solutions.
The decision to move from Magento to Shopify is one of the most significant replatforming choices an ecommerce business can make. Magento is powerful, but its power comes with...
Accuracy gap is real: Traditional CPG forecasting carries a 25-40% MAPE error rate. AI-powered models bring that down to 8-15%, according to McKinsey research....
AngularJS directives are an extremely powerful feature. It begins with the phrase ng- and produces reusable web components. If we go a bit deeper, directives are marks on a DOM element that allow the Angularjs’s HTML compiler to apply a defined behavior or alter the DOM element and its children. AngularJS includes a vast variety of directives that allow you to link HTML elements and application data together. AngularJS, in fact, comes with pre-built directives such as ngBind, ngModel, and ngClass. The angular framework relies on these directives to teach the browser new HTML tags. Directives could be defined as HTML tags and CSS classes, attributes, and even HTML comments.
The following is a type of the most significant AngularJS directive that must be placed on any page when using AngularJS.
ng-app – <body ng-app>
You can create your own directives in the same way you create controllers and services. How can you create custom AngularJS directives? Is this question torturing your mind at this moment? The answer is pretty simple. The HTML compiler traverses the DOM matching directives against the DOM element when AngularJS bootstraps your application. It’s all set to go… but….don’t you love to dive deeper into the whole concept of creating custom AngularJS directives? This blog will help you out! In this blog post, we’ll go through how to create custom AngularJS directives. Before we move to the point, we would like to help you understand the basics of directive types.
When you paste this code into your browser, nothing happens. To tell the browser how to read this new HTML element named “my essentials list,” you’ll need to use Angular. The question that comes to mind is, “How do I tell the browser?” Isn’t it?
The solution is simple.
Simply define the attributes of a new directive.
How do you define the attribute of a new directive? Have any ideas?
Don’t worry! We’re here to help you out. Let’s start the process by creating an app and adding a new directive.
This directive can be used to initialize variables in the AngualrJS application. The following example demonstrates the ng-init directive that initializes variables of string, number, array, and object.
The directive is used for two-way data binding in AngularJS. It binds <input>, <select> or <textarea> elements to a specified property on the $scope object. So that the value of the element will be the value of a property and vice-versa.
This directive links the HTML element to the model property declared using $scope or the ng-model directive, or the result of an expression. If the value of expression changes, it also updates an element.
Example: ng-bind
If you don’t comprehend what’s going on in this article, don’t be scared. You should grasp what each line of code is saying by the end of this tutorial. We’re creating an Angular module named “myApp” in the first line, which will return an “app” instance where we can define our Angular app. We’ll add a directive called “myTodo,” which differs from the “my-todo” directive we used in the above HTML code. That’s because, in HTML, tag names and words are separated by a hyphen, such as “my-todo.” In Angular, on the other hand, they match the same element with terms joined together and capitalize the first letter of each term, except the first, “myTodo.” The method of combining words is known as “camelCase.” You’ll note that a directive is named “myTodo” and has the function “todo.” Depending on what we want to achieve, the latter provides an object with several attributes.
We have three attributes in our case:
Restrict
TemplateUrl
Scope
Let’s go over each one one at a time.
1. Restrict
The “restrict” attribute instructs Angular on how to generate a new directive in a single letter. It can take one of four values: A, C, E, or M, or a mixture of them, such as EA. ME, etc. Each has its own significance. Let’s find out in the below table. Using our To-do example, the combined value of ‘EA’ signifies that it will match any element that has our directive as an attribute, as well as an element that is declared as “”. Only to restrict to either ‘E’ or ‘A’ or both, it’s easy to misinterpret classes “C” and comments “M.” That is why we are just using EA.
2. Template
Templates are simply HTML codes that may be reused with changing values or text several times. They use placeholders attached to variables that can be readily replaced in order to be generic enough.
Create a file called “todo.tpl.html” with the following code
Our template includes placeholders for variables like Creating custom AngularJS directives, which will be changed with real title text. It will be replaced with a task name in the same way. All you have to do is utilize Angular’s first built-in directive, “ng-repeat.” This directive will repeat itself for each element in an array of elements, such as our list, and refer to them as “todo.” To put it another way, if the list has four elements, we’ll see four checkboxes, each with the name of the respective activities.
Now, it’s time to explain where “title” and “list” come in this section. Going back to our directive definition, we could have used the “template” attribute instead of the “template URL” and taken inline code directly, but often it is hard to read. We would prefer to use a template URL and be defined as a separate file. You might be thinking “template URL” takes the name of the file containing the template. If all templates and code are in the same directory, just the name of the file will do. However, if they are in different folders, you’ll need to specify the full path to reach it. In simple words, you just have to place files in a single directory.
3. Scope
The scope is the binding part between HTML (view) and compiler (javascript). When you make a controller in AngularJS, you pass the $scope part object as an argument.
Example:
When properties are added to the $scope object in the controller, the view (HTML) will access them. You don’t use the prefix $scope in the view; instead, you refer to a property name, such as bikename. The model and controller will be updated if you make changes to the view:
As we’re constantly discussing the controllers, you would be wondering what controllers are. Are you? Let’s know about controllers.
Controllers in AngularJS Directives
Controllers are used to setting up initial settings in the scope and add behavior via functions. To define the “todo” list you want to render using our newly generated directive; you’ll have to use a controller.
Have you noticed that we named our controller “main” and passed a function to it via the “$scope” parameter? It’s necessary because whatever we put in the “$scope” variable will show up in templates and other directives. We just finished defining our todo list as an array of objects with the names of two properties.
To-do Directives in AngularJS
Finally, we’ve created the to-do directives. Let’s have a look at them.
myApp” module
“myTodo” directive
“todo.tpl.html” template
“main” controller
Now is the time to put everything together and make it work! Let’s create an index.html page with the following:
You first include the AngularJS library and then use the built-in directive “ng-app” to start the app. It’s important to note that this must match the “myApp” module we created, or else it won’t work. Later, you have to use the “ng-controller” core directive to refer to your controller. It takes a value that should match the one you defined, in this case, the “main” controller, just like ng-app. This main controller defines your “todo” as an array of tasks with names and whether or not they have been done. Finally, put your new direction into action! Remember you’ve already defined a template within the directive declaration to know how to render the content. It has two properties: a title and a list. That’s all you need to make it for creating custom AngularJS directives. You can do this to-do list many times. Just pass different values to list in your to-do, the browser will render it for you. You can also define another controller with different $scope.todo and your directive will respond accordingly.
Now, your Turn!
Have you found this article helpful and interesting? If you have read the information carefully, then you will be able to create custom AngularJS directives. Here are some things you can do right now. Leave your thoughts and opinions in the comment section below. If you have any questions or want a consultation or services regarding Angular JS, you can hire dedicated angular developers from APPWRK. It is our promise to serve you the best!
Gourav Khanna is the Co-founder and CEO of APPWRK, leading the company’s vision to deliver AI-first, scalable digital solutions for enterprises and high-growth startups. With over 16 years of leadership in technology, he is known for driving digital transformation strategies that connect business ambition with outcome-focused execution across healthcare, retail, logistics, and enterprise operations.
Recognized as a strategic industry voice, Gourav brings deep expertise in product strategy, AI adoption, and platform engineering. Through his insights, he helps decision-makers prioritize market traction, operational efficiency, and long-term ROI while building resilient, user-centric digital systems.