How to Set up Dockerizing WordPress with Nginx Web Server?
Are you tired of inefficient WordPress hosts? To get rid of the slow server response time and slow page loading time, we will learn today about setting up a super-fast Dockerizing WordPress with Nginx web server on Ubuntu 20.04 to achieve maximum performance. WordPress is an amazing open-source and free Content Management System currently millions of websites across the globe are operated over it. Docker is an open-source platform that allows you to pack and execute any application as a lightweight container. It has no barrier for any language, packaging system, or frameworks and can be operated from anywhere through your small PC or high-end servers. It’s a great tool for deploying databases, web apps, and back-end services regardless of the particular stack. Let’s dockerize the latest WordPress package with help of Nginx and PHP-FPM Web Server.
Table of contents
How to Install a Docker Compose Package?
Docker-compose is a command-line tool to define and manage multi-docker containers of a single service. With compose, you can execute multiple docker containers with a single command. It allows creating a binary file for a service, amazing for development and testing environment.
Step 1 – Docker Installation
1.1. Start from scratch and before you begin, install the latest updated Ubuntu repository.
Use the Command :
sudo apt-get update
sudo apt-get upgrade
1.2. Manually install docker and docker-compose available in the Ubuntu repository with the apt command.
Use the Command :
sudo apt-get install -y docker.io
1.3. After you are done with the installation, Add docker and it would start working automatically at boot time.
Use the Command :
systemctl start docker
systemctl enable docker
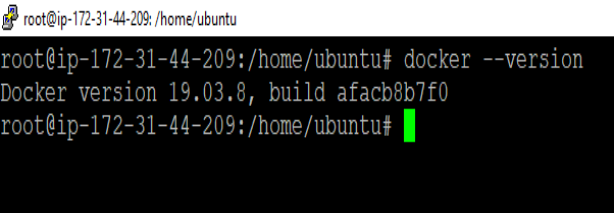
1.4. To check the docker installation enter the command below.
Docker –version 19.03.8

Step 2 – Install Docker -Compose
2.1. The Ubuntu 20.04 repository has the Docker Compose package but to check for the latest version visit the Compose repository release page on GitHub. Get the new version available and download the file to a directory for making it executable.
2.2. Use curl to download the Compose package into the/usr/local/bin directory.
Use the Command :
sudo curl -L
“https://github.com/docker/compose/releases/download/1.25.5/docker-compose-$(uname -s)-$(uname -m)” -o /usr/local/bin/docker-compose
2.2. After downloading is complete, allow the file with executable permissions.
Use the Command :
sudo chmod +x /usr/local/bin/docker-compose
2.3. For installation verification, to get a print of the Compose version, execute the command.
Use the Command :
docker-compose –version
2.4. The system will show this output.

Use the Command :
docker-compose version 1.25.5, build b02f1306
Docker Compose has been installed in your Ubuntu system successfully, start using it.
How to Integrate Docker with Nginx?
Use nginx-proxy containers to integrate Docker and Nginx together. This can be performed with a single docker command or docker-compose. Here, I will cover both commands.
- Initially, you need to create a Docker network to connect all relevant containers together.
Use the Command :
$ docker network create nginx-proxy
Make sure you always add a new container to the nginx-proxy Docker network because each service requires an individual container for execution.
2.a. To Install nginx-proxy with Docker
Use the Command :
$ docker run -d -p 80:80 –name nginx-proxy –net nginx-proxy -v /var/run/docker.sock:/tmp/docker.sock jwilder/nginx-proxy
2.b. To Install nginx-proxy with docker-compose
Create a docker-compose.yml file in the saved directory.
Use the Command :
version: “3”
services:
nginx-proxy:
image: jwilder/nginx-proxy
container_name: nginx-proxy
ports:
– “80:80”
volumes:
– /var/run/docker.sock:/tmp/docker.sock:ro
networks:
default:
external:
name: nginx-proxy
3. To start working with Docker-compose.
Use the Command :
$ docker-compose up -d
How does Nginx-proxy host multiple websites?
The Docker container port allows the incoming traffic to flow out through nginx. The line /var/run/docker.sock:/tmp/docker.sock provides container access to the Docker socket of the host which holds information about the multiple Docker events.
Every time you create a container, Nginx-proxy observes the event through the socket, automatically adds file configuration to route traffic, and restart Nginx to implement the changes immediately. nginx-proxy checks for variable enabled VIRTUAL_HOST, which is important for the execution of operations.
Use the Command :
In Docker, the command –net nginx-proxy , and the networks: default: external: name: nginx-proxy limits the docker-compose.yml file and allows you to establish a communication network among all the containers.
How to Add Containers to the Proxy?
The container includes all libraries, binary code, executables, and configuration files. It’s the standard unit hold code package on which execution of application depends. While working with Nginx-proxy, you can add new containers, which would be automatically configured.
Use Docker
The basic configuration step to dockerize WordPress is quite easy.
Use the Command :
$ docker run -d –name blog –expose 80 –net nginx-proxy -e VIRTUAL_HOST=blog.DOMAIN.TLD wordpress
The –expose 80 enables the traffic to flow inside the container to port 80.
The –net nginx-proxy ensures you use the Docker network created.
The -e VIRTUAL_HOST=blog.DOMAIN.TLD indicates nginx-proxy to establish the proxy information and direct the incoming traffic to the right domain.
Use Docker-Compose
Create a docker-compose.yml file in a blank directory.
Use the Command :
version: “3”
services:
db_node_domain:
image: mysql:5.7
volumes:
– db_data:/var/lib/mysql
restart: always
environment:
MYSQL_ROOT_PASSWORD: PASSWORD
MYSQL_DATABASE: wordpress
MYSQL_USER: wordpress
MYSQL_PASSWORD: PASSWORD
container_name: wordpress_db
wordpress:
depends_on:
– db_node_domain
image: wordpress:latest
expose:
– 80
restart: always
environment:
VIRTUAL_HOST: blog.DOMAIN.TLD
WORDPRESS_DB_HOST: db_node_domain:3306
WORDPRESS_DB_USER: wordpress
WORDPRESS_DB_PASSWORD: PASSWORD
container_name: wordpress
volumes:
db_data:
networks:
default:
external:
name: nginx-proxy
Begin with db_node_domain to host a variety of WordPress blogs and create unique names in the database for each. Replace db_node_domain with preferred names.
Like this: WORDPRESS_DB_HOST: db_node_domain:3306
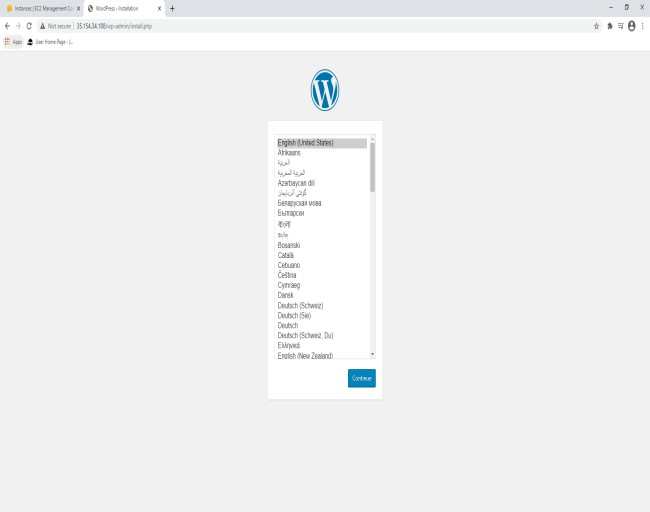
Once you are done with the configuration set up, run the docker-compose up -d command. Enter your server IP address: http://serverIP/ to check the dockerize WordPress.

Things would work properly as long as the DNS is configured to route the traffic properly. So WordPress is dockerized successfully using Nginx. Now you can add an infinite number of extensible WordPress sites for any service to the Nginx-proxy network.
Conclusion
WordPress is Dockerized using a safe and secure Nginx host system. These short and simple steps would enable you to completely configure WordPress in Docker Container using Nginx Web Server to maximize your site performance. To improve the docker-compose files you can create a customized database for each instance of WordPress. Now you can install WordPress with Docker and Docker Compose as well. Happy Dockering!
Related Links:
About The Author


 Free Quote


