How To Build a Webflow Website?
Webflow is emerging as a popular trend among web designers who are eager to work on dynamic components for building highly engaging websites. Even though it is a new technology, still a leading-edge for the upcoming generation. With the help of Webflow, you can easily create an impressive website design without worrying about complex codes. If you are new to using Webflow, then you may find it tough but gradually you will get a hand on it. In this blog, you will find step-by-step instructions on how to build a basic e-commerce store, blog, or any other type of business website using Webflow.
Webflow website development is a great way to create custom, responsive websites with minimal code, allowing you to focus on design and functionality.
To know more about ( What is Webflow , Is Webflow good , Is Webflow better than WordPress , what is Webflow used for and similar questions like these) , do not forget to read our detailed article on What is Webflow?
Let’s dive into the topic and find out how to build a Webflow website.
Table of contents
- Step 1: Sign up for Webflow
- Step 2: Fill Up The Questionnaire
- Step 3: Select a Template or Theme
- Step 4: Choose an Attractive Name for Your Website
- Step 5: Customize Your Website
- Step 6: Select a Hosting Plan
- Step 7: Browsers Support Features
- Step 8: Final Testing and Review
- Step 9: Launch
- Final Thoughts
- Frequently Asked Questions
Step 1: Sign up for Webflow
Start by visiting webflow.com and go through the website properly. After this, click on the “Get Started-it’s free” on the top right side or “start building” on the home page. Please find the below-attached screenshot for your reference.

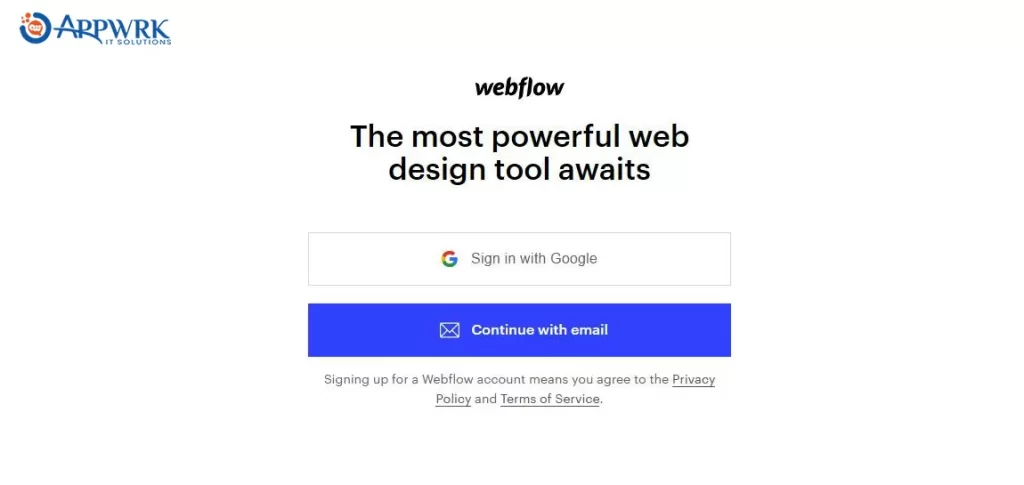
On clicking “start building”, you find the “sign-in” tab flashing on your screen. Here, you have two sign-in options. You can either sign in with a Google account or an email. Then you will need to create a password with a minimum of 10 characters long. Password must include at least one uppercase letter, a lowercase letter, and a number. After this click on the “Create Account” tab.
Step 2: Fill Up The Questionnaire
Once you have successfully created a Webflow account, you will be asked to fill out a questionnaire. Here, I have listed certain questions that you may be asked.
Q1. Choose a Greeting Name
The very first question will be your name. Start with the name you want Webflow to greet you. You may add your short name or nickname as per your preference. Click “Continue” for the next question.
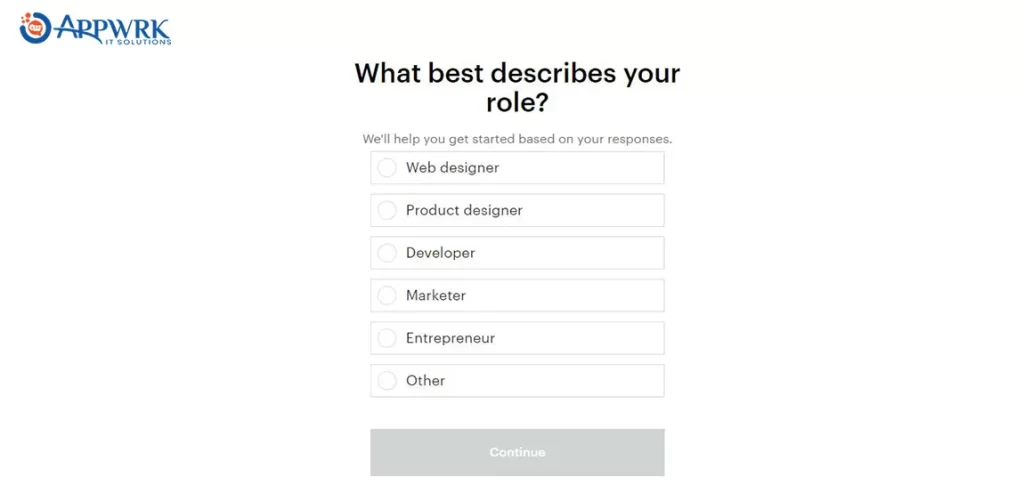
Q2. Specify Your Roles
In the second question, you will be asked for describing your role. Choose the most suitable role among the various listed roles. If you don’t find any suitable role from the list, then tap on the “other” and continue.
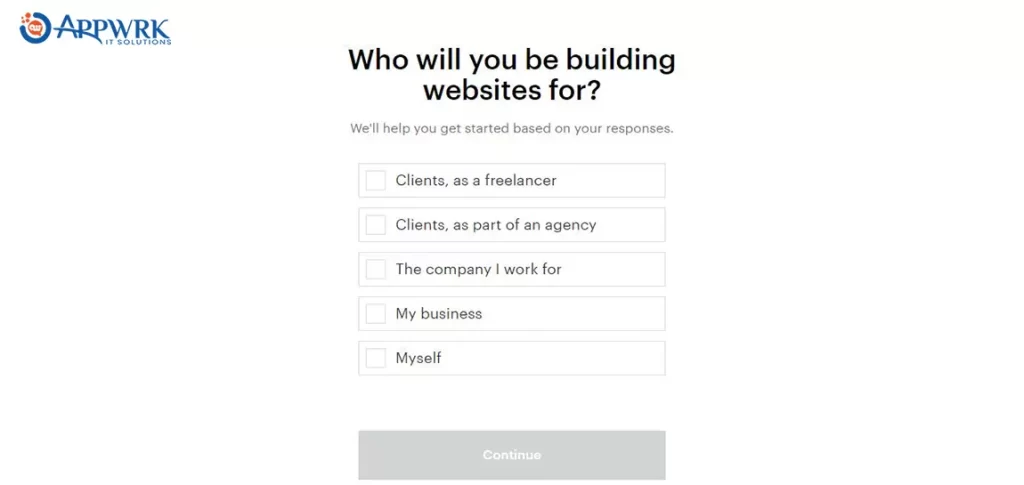
Q3. Specify To Whom You are Building the Website
Next, you will be asked to specify for whom you are building a website such as for a client, your own business or company or to learn. You will also find an option as a freelancer or association with an agency. Try to fill up the correct response and press continue.
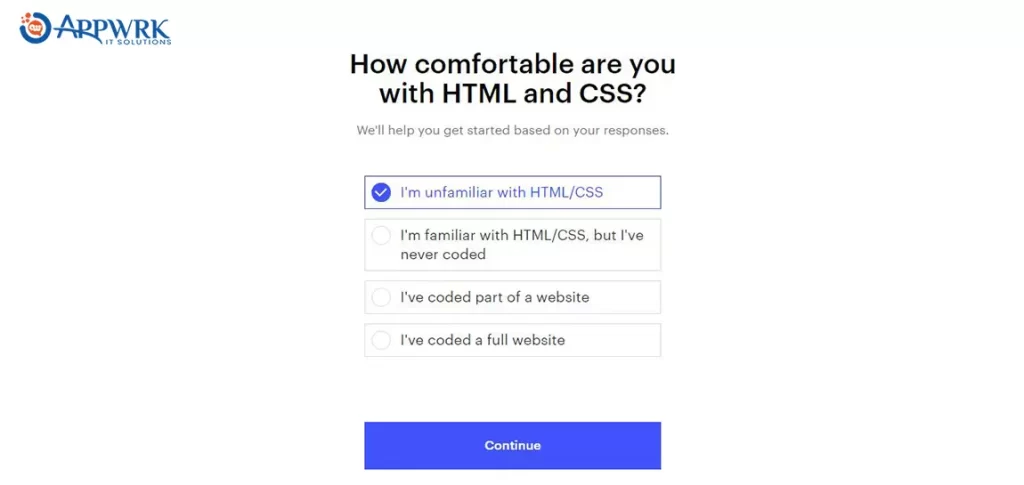
Q4. Knowledge About HTML/CSS
The next question will be based on your knowledge. Try to fill this question, carefully as you will get started based on your responses. You will be asked about your knowledge of computer languages such as HTML/CSS. If you are not from a computer background, it is suggested to tap on the first option “ I’m unfamiliar with HTML/CSS”.
Q5. Specify the Type of Webflow Website You Want To Build
At last, you will need to specify the type of website you want to build. There are various types of Webflow websites such as business sites, eCommerce sites, portfolios, blogs, and many others. Let’s find out the difference between them.
- Business Site
A business website may include various sections and pages. Generally, it includes a home page, service page, blog page contact, and support page. Please find the attached image for more information.
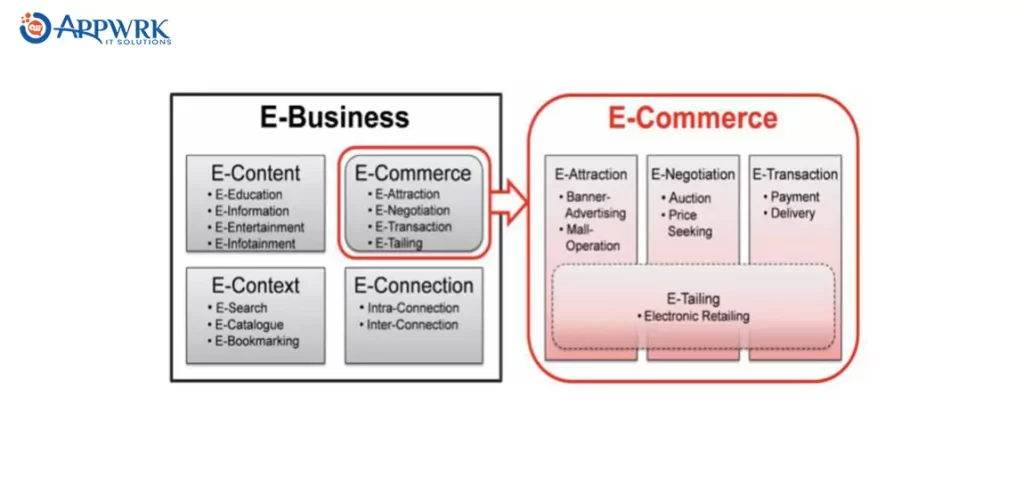
- E-commerce Store
Though e-commerce is a part of the business, still, e-commerce store websites are designed differently. The website may provide online shopping or retailing.
- Portfolio
Portfolio websites are built to provide professional information about the individual or company and for showcasing their talent or works.
Tap on the selected Webflow website and click “finish”.
Step 3: Select a Template or Theme
After finishing up the Webflow questionnaire, you will be redirected to the template page. Here, you might be asked to learn before working. If you wish to learn then click on “Get Started” popping up on the top right side of your screen. It will look like the picture attached below!
After getting started, follow the guidelines and start preparing a demo website. Here, you need a layout for your Webflow website. There will be four options available such as grid, container, column, and section. Choose one as per your choice and drag it to your blank page.
If you are not opting to learn then you will be directed to the page with a variety of templates that you can use to create your Webflow website. The price of each template will appear in the bottom-right corner of the image.
Moreover, you may find various templates grouped as “New Templates”, “Free Templates”, E-commerce, and many more. If you want to check how it will look to the visitors, then click on the “Preview in Browser”
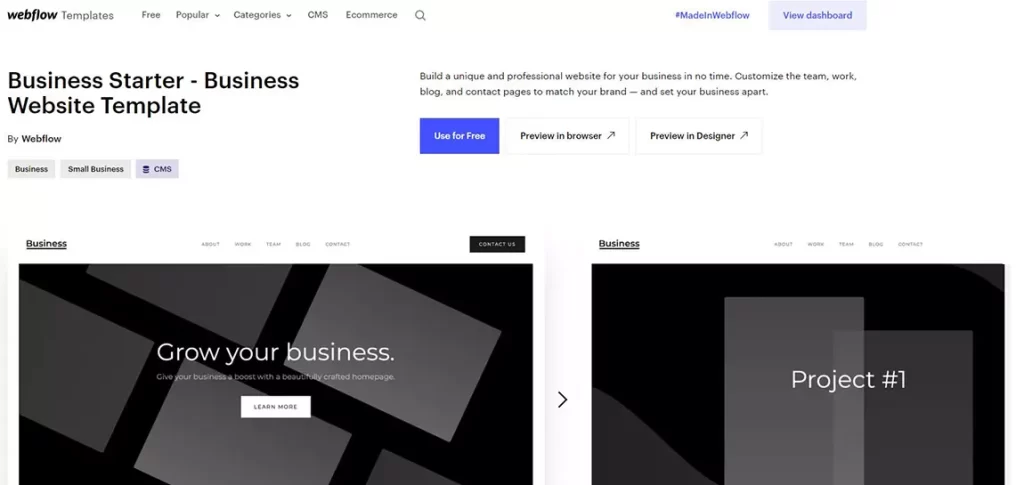
Now as you have selected your template, click on the “Use for Free” button.
Step 4: Choose an Attractive Name for Your Website
Once you have selected the layout, now it’s time to name your website. You will find a pop-up window in the heading “Name Your Project” as shown in the image.
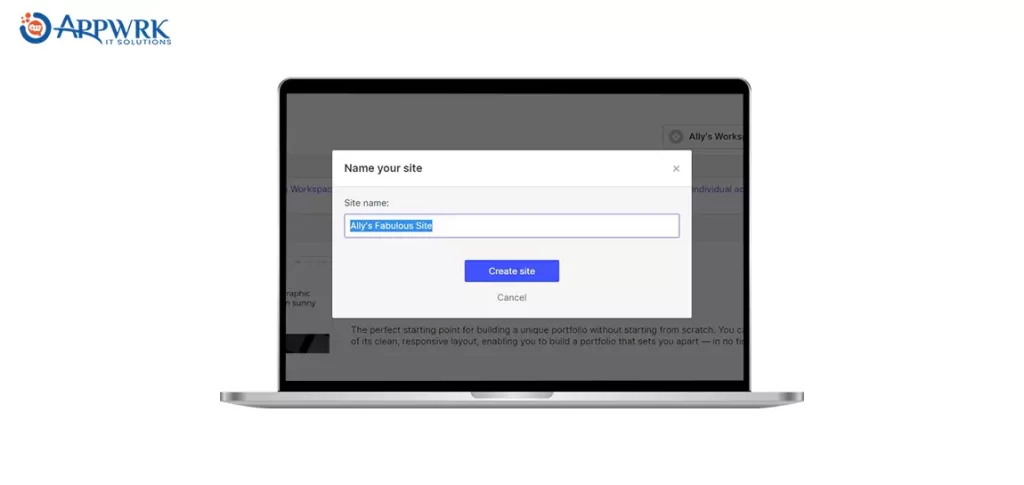
You can go as creative as you want to while typing a name. Then press “Create site”!
Step 5: Customize Your Website
Now, from this page your actual work as a Webflow designer starts! Here, you will find multiple editing options from selecting layout to adding content. Start by selecting the layout, elements, and symbols to add content to your Webflow website.
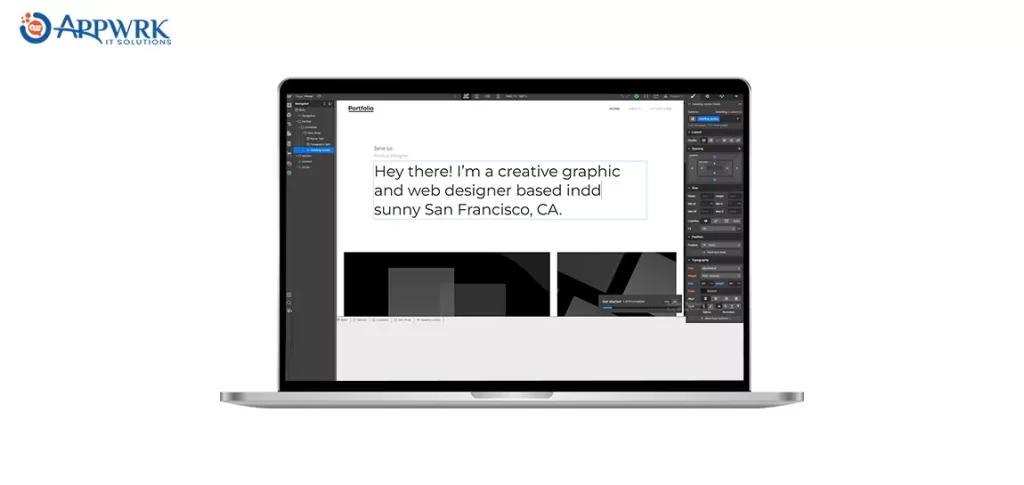
Adding Elements in Webflow
Let’s start by adding elements in Webflow.
To add elements to Webflow, Click on the Add option in the sidebar menu. Now hit the Element tab. Here, you will find multiple layout options. Select the most desired option and proceed to the next steps.
Adding Sections
Sections represent a layout element that stretches across the screen. This layout is basically ideal for background images, videos, and other content. Follow these steps to add sections to your Webflow website.
- Click on the Add option on the left sidebar menu.
- Once you click on the Add option, the Elements and Layout section will appear. Now, click on the Section tab appearing in the Layout section.
- Then, drag the section to your preferred site location.
- Once you are done adding the section to your website, Tap your section and use the right-hand menu to adjust the size and add contents. You can type in text or drag or drop media to add content.
Adding Columns
You can also add columns to your Weflow website. These columns are very similar to newspaper columns. Follow these steps to add columns to your site.
- To add a column, click on the Add option on the top left sidebar menu of your screen.
- Once you click on the Add option, the Elements and Layout section will appear. Now, click on the Column tab appearing in the Layout section.
- Then, drag the column to your preferred site location.
- You will find two columns automatically appearing on your screen. Here, you can adjust the number and layout of the columns.
- To edit click on the Gear icon appearing above them. Once you click on the Gear option a Column Setting option will appear beneath the newly added columns.
- Now, add the desired number of columns or layouts.
- Again Click on each column and the right-hand menu to adjust its content. You can also add text and drop media to it.
Adding Grids
A grid is the Webflow series of blocks that contain text, photos, or other media. Follow these stress to add a grid to the Webflow website.
- To add a grid, click on the Add option on the top left sidebar menu of your screen.
- Once you click on the Add option, the Elements and Layout section will appear. Now, click on the Grid tab appearing in the Layout section.
- Then, drag the grid to your preferred site location.
- You will find the new grid appearing with four new placed in a two-by-two formation.
- You can also add more blocks by clicking on the red Edit Grid button in the upper right corner of the grid.
- Click on the plus sign icon in the upper right corner to add another column and on the lower left to add another row.
- Once you finish adding the desired number of rows and columns to the grid, click on the Done button in the Editing Grid.
Adding “Div Blocks”
Div Blocks are the single box to place on the Webflow website page to add text, images, and other media. Follow these instructions to add Div Blocks to your site.
- To add a Div Blocks, click on the Add option on the top left sidebar menu of your screen.
- Once you click on the Add option, the Basic section will appear. Now, click on the Div Block tab appearing in the Basic section.
- Then, drag the Div Block to your preferred site location.
- Fill Div Block with text and media by clicking on it and using the right-hand menu.
Adding Lists
The list helps you to group elements or content to make your website feasible for your users. Follow these steps to add a list to your Weflow website.
- To add Lists, click on the Add option on the top left sidebar menu of your screen.
- Once you click on the Add option, the Basic section will appear. Now, click on the List tab appearing in the Basic section.
- Once you click on the List, the List Setting menu will appear where you can select your desired list type and list style.
- Then, drag the List to your preferred site location.
- You will find the new list appearing with three items. To add more items right-click and tap on the Duplicate option.
- Now, you can directly add text to each list item and use font, color, and background to edit your text.
Adding “Link Blocks”
Here, you can fill your link block in the same way you did in Div Block. Follow these steps to add Link Blocks to the Weflow website.
- To add Link Blocks, click on the Add option on the top left sidebar menu of your screen.
- Once you click on the Add option, the Basic section will appear. Now, click on the Link Block tab appearing in the Basic section.
- Then, drag the Link Block to your preferred site location.
- Fill Link Block with text and media by clicking on it and using the right-hand menu.
- To add a link, click on it and then tap the Gear icon in the upper right corner of the block.
- If you wish to send visitors to an external website, then click on the Chain icon of the Link Setting menu on the right and then paste the destination web address into the URL field. Your visitors can also access the website in a separate tab. To enable a separate tab click on Open in New Tab.
- To send visitors to another page click on the Page icon at the top of the Link Setting menu. Here, you will find a drop-down list where you can choose the destination page.
- Again to send visitors to the specific section on the website, click on the third icon at the top of the Link Settings. Then repeat the above-mentioned step.
- To enable visitors to send an email, click on the Envelope icon at the top of the link settings. Enter your E-mail address and the desired subject line.
- To enable visitors to contact you via phone, click on the Phone icon at the top of the link settings and enter your phone number.
Adding Buttons
Buttons are added to navigate users to the external website, another page, or a section within your website. It also enables users to contact you.
- To add Link Blocks, click on the Add option on the top left sidebar menu of your screen.
- Once you click on the Add option, the Basic section will appear. Now, click on the Button box tab appearing in the Basic section.
- Then, drag the button box to your preferred site location.
- Fill the button box with text and media by clicking on it and using the right-hand menu.
- To add a link, click on it and then tap the Gear icon in the upper right corner of the block.
- If you wish to send visitors to an external website, then click on the Chain icon of the Link Setting menu on the right and then paste the destination web address into the URL field. Your visitors can also access the website in a separate tab. To enable a separate tab click on Open in New Tab.
- To send visitors to another page click on the Page icon at the top of the Link Setting menu. Here, you will find a drop-down list where you can choose the destination page.
- Again to send visitors to the specific section on the website, click on the third icon at the top of the Link Settings. Then repeat the above-mentioned step.
- To enable visitors to send an email, click on the Envelope icon at the top of the link settings. Enter your E-mail address and the desired subject line.
- To enable visitors to contact you via phone, click on the Phone icon at the top of the link settings and enter your phone number.
Creating Headings
Headings are the titles of your website’s individual pages and subsections. Headings serve as an important quick source of information to your visitors. Moreover, it helps search engines use headings to determine the site’s most important themes and topics.
Follow these steps:
- To add headings, click on the Add option on the top left sidebar menu of your screen.
- Once you click on the Add option, the Typography section will appear. Now, click on the Heading box tab appearing in the typography section.
- Then, drag the new heading to your preferred site location.
- Enter the text you want to be visible in the headings.
- Choose a heading and then click on a Gear icon.
Note: You can also adjust the heading’s font, size, color, and background under the Paintbrush tab in the right-hand menu.
Creating Paragraphs
It refers to the text with multiple images. Find how to create paragraphs in the below-listed steps.
- To add paragraphs, click on the Add option on the top left sidebar menu of your screen.
- Once you click on the Add option, the Typography section will appear. Now, click on the Paragraph box tab appearing in the typography section.
- Then, drag the new paragraph to your preferred site location.
- Enter the text you want to be visible in the paras.
Note: You can also adjust the paragraph’s font, size, color, and background under the Paintbrush tab in the right-hand menu.
Creating Text Links
Text links help visitors to navigate to an external website or another page or section within the website. Follow the below-listed steps:
- To add text links, click on the Add option on the top left sidebar menu of your screen.
- Once you click on the Add option, the Typography section will appear. Now, click on the Text Link tab appearing in the typography section.
- Then, drag the new text link to your preferred site location.
- Enter the text you want to be visible in the text link.
- To add a link, click on it and then tap the Gear icon in the upper right corner of the block.
- If you wish to send visitors to an external website, then click on the Chain icon of the Link Setting menu on the right and then paste the destination web address into the URL field. Your visitors can also access the website in a separate tab. To enable a separate tab click on Open in New Tab.
- To send visitors to another page click on the Page icon at the top of the Link Setting menu. Here, you will find a drop-down list where you can choose the destination page.
- Again to send visitors to the specific section on the website, click on the third icon at the top of the Link Settings. Then repeat the above-mentioned step.
- To enable visitors to send an email, click on the Envelope icon at the top of the link settings. Enter your E-mail address and the desired subject line.
- To enable visitors to contact you via phone, click on the Phone icon at the top of the link settings and enter your phone number.
Creating Text Blocks
Generally, text blocks are for texts that aren’t a heading, paragraph, or link. Follow the below-listed steps:
- To add text blocks, click on the Add option on the top left sidebar menu of your screen.
- Once you click on the Add option, the Typography section will appear. Now, click on the Text Block tab appearing in the typography section.
- Then, drag the new text block to your preferred site location.
- Enter the text you want to be visible in the text block.
Note: You can also adjust the text block’s font, size, color, and background under the Paintbrush tab in the right-hand menu.
Creating Block Quotes
It is used to make your text look bolder and typically larger than others. They are also known as pull quotes.
Follow the below-listed steps:
- To add text blocks, click on the Add option on the top left sidebar menu of your screen.
- Once you click on the Add option, the Typography section will appear. Now, click on the Text Block tab appearing in the typography section.
- Then, drag the new block quotes to your preferred site location.
- Enter the text you want to be visible in the text block.
Note: You can also adjust the text block’s font, size, color, and background under the Paintbrush tab in the right-hand menu.
Adding Forms
Forms are added for visitors to add their personal details and contact information. This information helps businesses for sales and marketing purposes.
- To add forms, click on the Add option on the top left sidebar menu of your screen.
- Click on the Form Block box appearing in the form section.
- The new form will automatically include fields in which site visitors can add their names and email addresses.
- Then, drag the new form to your preferred site location.
- Here, you can add several elements such as:
Labels
Input fields
File uploads
Text areas
Checkboxes
Radio buttons
Select Menus
reCAPTCHA Feature
Adding Drop-Down Menus
Drop down menu presents various list options. It helps visitors to navigate through various parts of a website. However, many people still get confused and ask themselves, “how to create a dropdown menu?”Creating a dropdown menu on Webflow is simple and requires just a few steps to set up and customize.
- To add a drop-down, click on the Add option on the top left sidebar menu of your screen.
- Click on the Dropdown box appearing in the components section.
- Then, drag the new drop-down to your preferred site location.
- Enter the text you want to be visible in the text block.
- Now, click on the drop-down menu and select the Dropdown Toggle option. You will find the Dropdown Toggle Settings menu appearing on the right of your screen.
- Open the menu under the Gear Icon.
- A list with 3 links will appear below the drop-down menu.
- If you wish to add more links, right-click on the existing link and select Duplicate.
- Again you can add an external website link and another page link as mentioned above.
Adding Maps
You can also add a personalized map to help visitors to locate your business.
- To add maps, click on the Add option on the top left sidebar menu of your screen.
- Click on the Map box appearing in the components section.
- You will find a new map appearing at the bottom of your website. Here, you will be required an API key.
- You will receive a notification displaying the API key. Now, click on the Add API Key button and enter the key.
Adding Media on Webflow
Webflow website builder allows users to add pictures and videos in multiple ways. You can use these videos as background or add Youtube videos by creating light boxes or sliders. Additionally, if you want to style text uniformly across the website, you can use the webflow make lowercase function to convert text to lowercase for consistency in the design. Moreover, Webflow add caption to image feature allows you to include descriptive text with your images, improving clarity and user engagement.
Adding Photos
You can add various images to your website and make it look more appealing. Additionally, you can use Webflows Add Caption to Image feature to include descriptive text, enhancing clarity and engagement.
- To add photos, click on the Add option on the top left sidebar menu of your screen.
- Click on the Image box appearing in the Media section.
- Drag the new images to your preferred site location.
- Click on the Gear icon and select Choose Image button.
- Choose the image and click on the Upload button.
Adding Videos
Same as photos, videos make your website more engaging, vibrant, and dynamic. If you’re adding text over or below videos, the webflow make lowercase function ensures consistent typography and visual harmony.
- To add videos, click on the Add option on the top left sidebar menu of your screen.
- Click on the Video box appearing in the Media section.
- Drag the new video to your preferred site location.
- Click on the Gear icon and select the Video Settings menu.
- Now enter the web address of the video in the URL field.
Embedding YouTube Videos
As said above, you can also add YouTube videos to your website. Additionally, if you need to provide users with downloadable content, Webflow creates a direct download link YouTube feature that allows easy access to video files directly from your website.
- To embed YouTube videos, click on the Add option on the top left sidebar menu of your screen.
- Click on the YouTube appearing in the Media section.
- Drag the YouTube box to your preferred site location.
- Click on the Gear icon and select the YouTube Settings menu.
- Now enter the web address along with the timestamp of the video in the URL field.
Adding Background Videos
You can also place videos in the Webflow website builder background.
- To add a background video, click on the Add option on the top left sidebar menu of your screen.
- Click on the Background Video appearing in the Components section.
- Drag the new background video to your preferred site location.
- Click on the Gear icon and select the Background Video Settings menu.
- Now click on the Upload Video button
Note: Webflow video file must not exceed 30 megabytes(MB). In addition, the Webflow video player supports WebM, MP4, and QuickTime Movie(MOV) file formats.
Adding a Light Box
This feature allows you to display images or videos with the caption in a module for a full-screen view compatible with all devices. Needless to say, users looking for webflow add caption to image feature, this is the perfect option.
- To add a lightbox, click on the Add option on the top left sidebar menu of your screen.
- Click on the Lightbox appearing in the Components section.
- Drag the new lightbox to your preferred site location.
- Click on the Gear icon and select the Choose Image to add media.
Adding Sliders
These are the rotating gallery for photos and videos.
- To add a Slider, click on the Add option on the top left sidebar menu of your screen.
- Click on the Slider appearing in the Components section.
- Drag the new slider to your preferred site location.
- The new slider automatically contains two slides. Click the Duplicate option to increase the number of slides.
- Finally, add images and other media to your slides.
Adding Social Media Buttons on Webflow
Adding social media links to your Webflow website helps your website to build a strong social media presence. It is important to link your websites to social media accounts. In addition, you can easily connect to your visitors on Facebook and Twitter accounts.
Adding a Facebook Button
Adding a Facebook button helps your visitors to check your Facebook post, like, and follow them.
- To add a Facebook-Buttons, click on the Add option on the top left sidebar menu of your screen.
- Click on the Facebook box appearing in the Components section.
- Your newly added Facebook-button will appear at the bottom of your web page in the footer area.
- Now, enter the URL in the Facebook Settings.
Adding a Twitter Button
Adding a Twitter button will enable your visitors to follow or tweet to your Twitter account.
- To add a Twitter-Buttons, click on the Add option on the top left sidebar menu of your screen.
- Click on the Twitter box appearing in the Components section.
- Your newly added Twitter button will appear at the bottom of your web page in the footer area.
- Now, enter the URL in the Twitter Settings.
Add Pages by Static or CMS
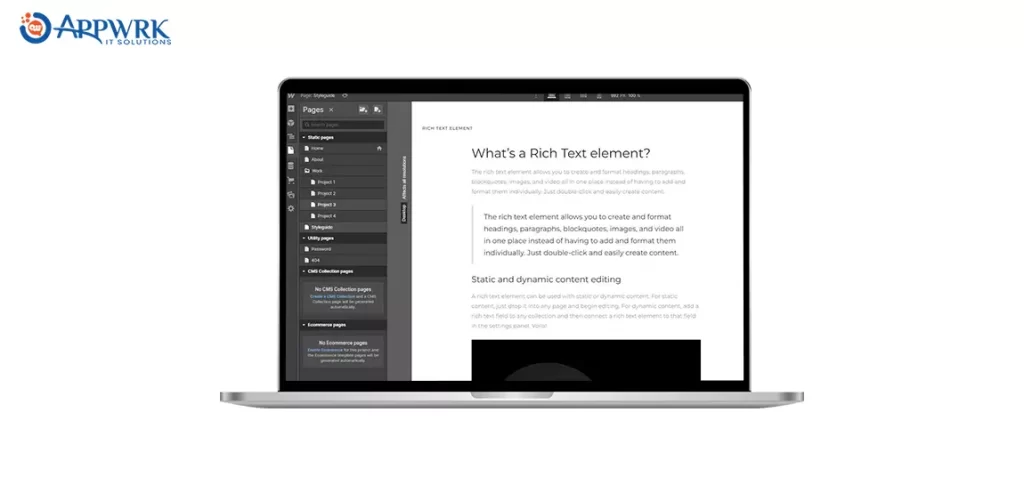
Proceed with adding pages to your project. You may find static, utility, E-commerce, and CMSCollection pages flashing on the left side of the screen. Further, you will get various static pages listed as Home, about, and work. If you are new to all these pages and find these terms, then you can tap on the style guide and learn about static and dynamic content editing. If you want to enhance your design further, you can turn the static pages into a collection webflow, which will allow you to manage content dynamically, making it easier to update and scale your site in the future.
Add Content To Your Webflow Website
Now add relevant content to your website. Here, you may need a team of content writers and Webflow designers (Hire the best ones now!) to add value to your project. If you already have written content, then you can go for adding it with the help of a webflow designer. Otherwise, it is recommended to hire a good Webflow designers company such as APPWRK IT Solutions.
By partnering with a Webflow design company , you will get the best team of designers, developers, and writers to develop a dynamic website.

Animations and Interactions
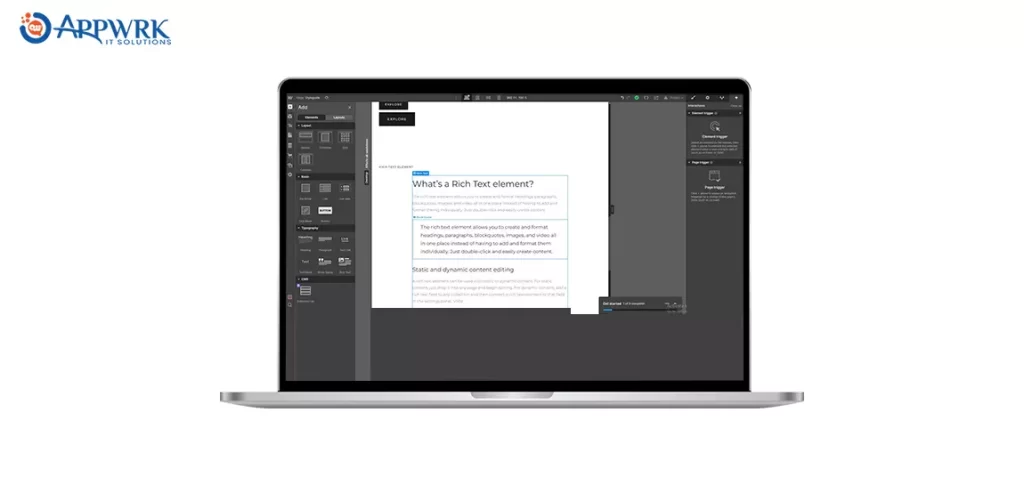
After adding a sufficient amount of content, go for interaction. Here, you can edit your content using various variations, styles, and displays. Interaction includes scroll parallax and animations. If you are struggling to find them, then have a look at the given image below.
Step 6: Select a Hosting Plan
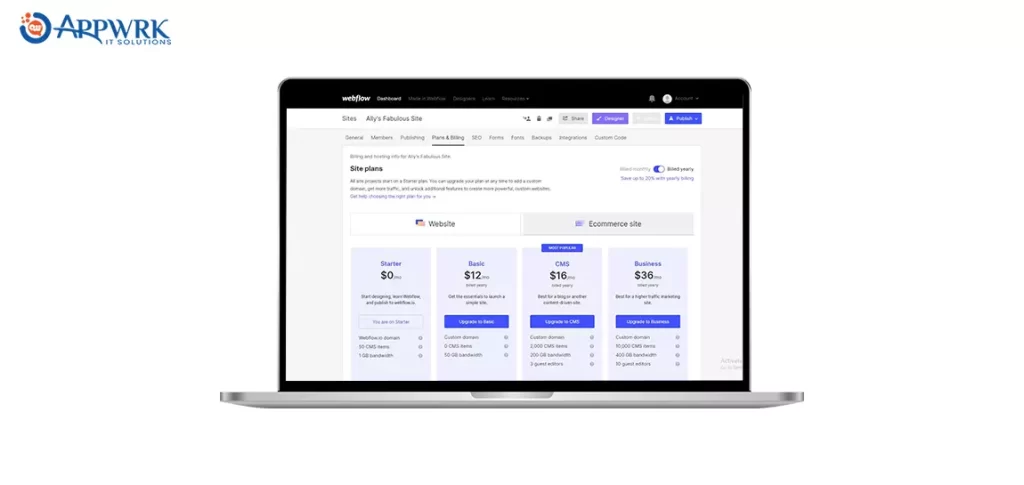
After completing your editing, the next step in Webflow website development is to check the “Plans and Billing” for publishing your Webflow website. Again, there are various plans from starters to businesses depending on different features. Generally, all projects start with a starter plan but you can upgrade your plan at any time to create a more powerful and creative website. Here, I have attached a few plans for your reference. Further, if you wish to check the features, click on “View all Plan Features”.
Step 7: Browsers Support Features
Now, the next step is to check mobile responsiveness and other browser support features of your Webflow website. As your website should be device friendly, try testing your Webflow website on as many devices as possible. If you don’t have access to many devices, then below mentioned Webflow tools can help you implement browser support features to your website.
Accessibility
Web accessibility is accessibility to people with some sort of disabilities. Your Webflow website design should be accessible to everyone including users who have difficulty in hearing, seeing, and navigating websites. Try using Webflow tools to make your website accessible. Still, if you face any difficulty, you can hire a webflow designer through a top Webflow-based development company such as APPWRK IT Solutions.
SEO
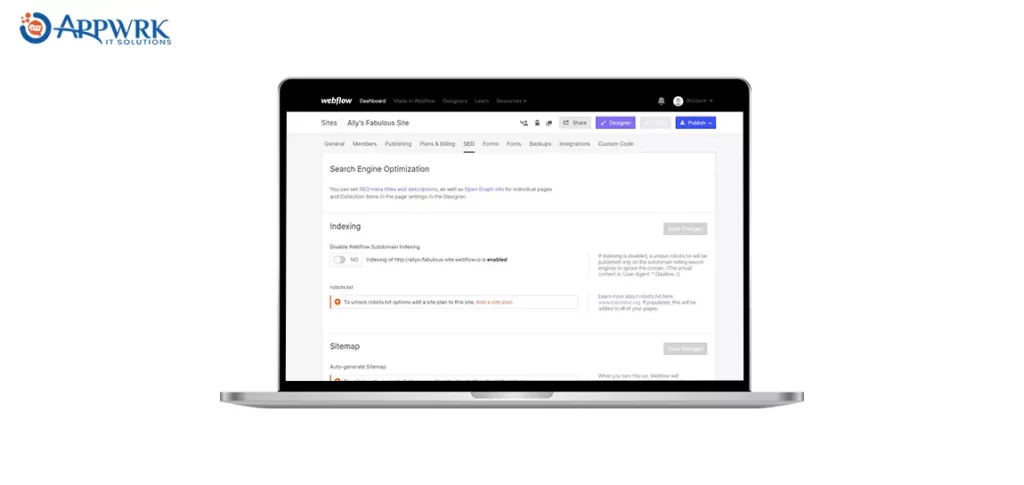
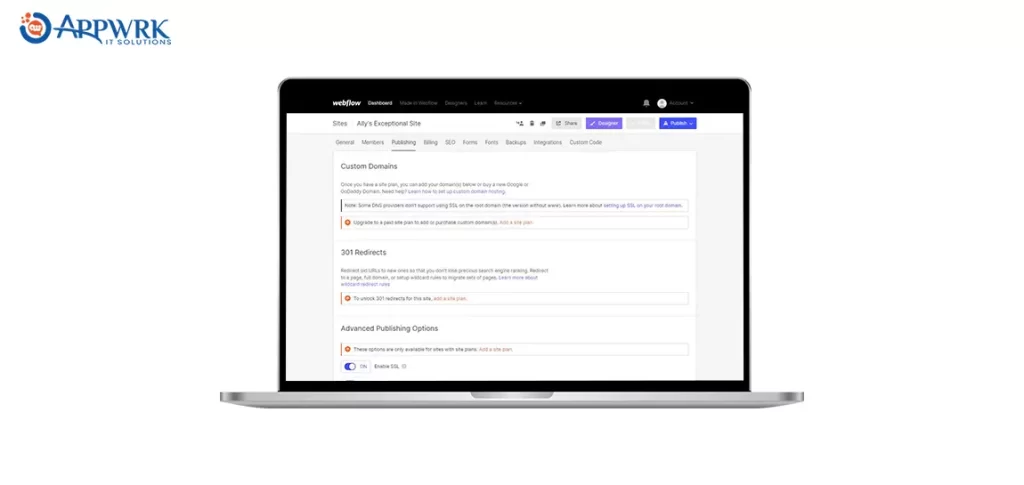
Before you start building websites from scratch, make sure your Webflow.io subdomain indexing is disabled in your project settings. SEO-based content improves website ranking and you may get more visitors. For this, you may need a team of digital marketing experts, Webflow designers, and website content writers to get things done.
Project Settings
There are a few pointers to follow before proceeding with the final steps. They are:
- Add a Webclip
- Add Favicon
- Custom CSS must be in the head tag, not in the footer
- Check Minify CSS and Minify JS.
Site Optimization
Optimization is necessary to ensure that your website runs smoothly and efficiently. There are several things you can do to make your content optimized for the user. When you’re focusing on webflow web design, follow best practices like:
- Compress your images
- Use of global CSS.
- Clean up all unused classes and interactions in the designer
Site Optimization is super important for your website, without which your website would not be able to be seen by the deserving audience at search engines. If you want to ensure your site gets the visibility it deserves, you can hire a web flow designer who can help fine-tune your site’s design and SEO. Click below and relax as your perfect site optimization headache is ours now !
Yes ! Please do my website’s optimization .
Step 8: Final Testing and Review
After developing your Webflow website, now it’s time for the final test and review project. For this, you will need a Webflow developer, who is skilled in testing websites. However, you get a multiskilled Webflow developer by partnering with Webflow-based development agencies such as APPWRK IT Solutions.
Step 9: Launch
The last and final step is to publish your website. When you are satisfied with your site’s appearance, accessibility, and optimization, click on the “Publish” button in the right corner of the design board. Still, if you are unable to find it, please look at the screenshot below.
Final Thoughts
Creating a Webflow website for businesses of any size has become fairly easy and time-saving, even without any prior coding experience. Webflow is considered a full-featured website builder for all types of websites. Webflow not only offers various attractive website templates, layouts, and easy customization but also ensures a great working experience for its users. However, it has become one of the smartest emerging technologies among website designers and developers.
Further, If you wish to prepare a dynamic Webflow website from professional designers or developers, then hire Webflow designers and developers from APPWRK IT Solutions. Our team of experts can help you to get the site exactly the same as you want it with zero hassle.
Wishing you a happy codeless Webflow website building! I hope this blog has helped you to build a perfect business website using Webflow. Still, if you have any doubts you can contact us.
Frequently Asked Questions
You can easily build custom blogs, portfolios, e-commerce stores, and other business sites with the help of Webflow. Webflow designers well versed with CMS, HTML, and JavaScript can help you build an excellent website in a few hours.
However, get a team of Webflow designers, Webflow developers, and content writers to convert your creative ideas into beautiful websites.
Adding a backendless backend with a Webflow frontend can help you get a relational database, highly secured, and serverless hosting experience. It also offers app-level flexibility to the Webflow websites.
Yes, Webflow is better than WordPress as it gives you complete designing freedom whereas WordPress is restricted by codes from scratch. Further, building websites using Webflow can give you good code quality and excellent working experience, whereas WordPress provides an extensive need for plugins which makes code more cluttered.
However, it is recommended to build Workflow based websites for every small and large-scale business.
Yes, you can build e-commerce websites using Webflow. There are various e-commerce templates in Webflow. But, selecting the perfect Webflow template and customization plays an essential role in making an excellent website. Get the best Webflow designers to customize your business website according to your business requirements.
When compared to WordPress, Webflow offers quite a fast hosting experience. Because Webflow is open-source, completely customizable, and allows anyone to build a website quickly, it is considered the first choice for a website designer.
To create a direct download link in Webflow is easy.
Step 1: Go to your Webflow project dashboard. In the Assets panel, click the Upload button to upload the file you want to offer for download (e.g., PDF, image, or document).
Step 2: After uploading, click the file and copy its URL.
Step 3: Drag a Link Block to your page where you want the download link.
Step 4: Paste the copied URL into the Link Block’s settings.
Step 5: Add text like “Download Now” inside the Link Block.
Step 6: Publish the site and test the link to ensure it works.
You can integrate backend technologies with Webflow. While Webflow is primarily a frontend tool, you can connect it to backend services using third-party integrations or APIs. This allows you to extend Webflow’s functionality by incorporating dynamic content, custom forms, and other backend features that suit your needs.
To Turn a static page into a collection in Webflow, follow the below-mentioned steps.
Step 1: Go to the Webflow Designer and create a new CMS Collection for your content type.
Step 2: Define dynamic fields (e.g., text, images, dates) to store content in your collection.
Step 3: On the static page, replace the static content with dynamic content linked to the CMS Collection.
Step 4: Create a template for the collection page to display items consistently.
Step 5: Once everything is set up, publish the page and watch it update dynamically as new content is added.
To create a lightbox text box on a single page in Webflow, follow the below steps:
Step 1: Simply drag the Lightbox element from the Components section into your layout.
Step 2: Link the Lightbox to an image or video by selecting the media you want to display.
Step 3: Insert a text element inside the lightbox to display text along with your media.
Step 4: Customize the lightbox and text as needed to suit your design.
Step 5: Finally, publish your page to see the lightbox with the text in action.
A downloadable link directly in Webflow may be made by linking files such as PDF, image, or video so that the users download them directly when they click on the link. To do it, follow these steps:
1. Upload the File:
-Navigate to the Assets Panel (left sidebar).
-Press the Upload button and choose the file that you wish to have downloaded by users.
2. Get the File URL:
3. Create the Download Link:
-Choose a Text Link or Button on your page.
-Navigate to the Settings Panel and insert the link copied in the URL field.
You can insert 2 lightbox text boxes on the same page in Webflow by dragging two different Lightbox elements from the Add Panel into your layout. Design each lightbox by inserting a text block within and connecting it to various media or images. Make sure that both lightboxes have distinct Group Names if you wish them to work separately.
Related Links:
About The Author


 Free Quote


