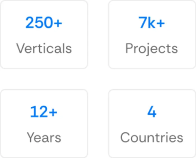
150+ minds across 4 countries. Join a culture of innovation, ownership & growth.
Rewire for AI
From machine learning to deep learning, from classification tools to overall process automation – our AI engineers will help you retool your existing system or enhance your company results.
Ship faster, scale smarter, built for product companies and SaaS teams
Our Latest Work
We strive hard to deliver result-driven digital solutions across the globe. Check out our case studies to get a glimpse of how we ideate, innovate, and create unconventional digital solutions according to the requirements of our clients.
Discover diverse and passionate insights from our tech enthusiasts. We collaborate across various sectors to streamline operations and drive innovation. Explore our rapidly growing collection of articles to see why we’re at the forefront of IT solutions.
The decision to move from Magento to Shopify is one of the most significant replatforming choices an ecommerce business can make. Magento is powerful, but its power comes with...
Accuracy gap is real: Traditional CPG forecasting carries a 25-40% MAPE error rate. AI-powered models bring that down to 8-15%, according to McKinsey research....
Webflow has loads of tools that lets you portray your agency work in an inspiring way in minimum time. You must be wondering, how? This all is possible with a code-free design to reveal yourself accurately. Webflow makes your client’s first interaction with the agency websites a memorable experience. Also, you influence the industry in a trustworthy and valuable manner.
Furthermore, you’re able to build a strong brand reputation with Webflow’s powerful CMS, creative templates, modern designs, and innovative concepts.
But is it rocket science? No.
You just need to know where to start and how to proceed further.
We have tried and tested many techniques and got you a simplified method for designing Webflow agency websites with minimal classes, API, flexbox, and CMS.
Let’s cover the step-wise approach to creating influential agency websites on Webflow. Here is the four-part series for the same.
Webflow Agency Websites Part 1: Laying the Foundations With a Style Guide and Collection Structures
Creating your agency website with code-free design is possible on Webflow’s visual canvas.
Well, Webflow provides easy-to-use drag-and-drop features so that your Website comes out the way you want it to.
But, are you confused about how to establish your brand elements on the website?
Some basic things are:
Create your own CMS items and integrate marketing tools to understand the data properly.
Understand how APIs work to pull out relevant information from the web.
Build content that resonates with your brand’s message.
Use modern web technologies like flexbox to scale your website seamlessly.
Establish wonderful experiences for both desktop and mobile users.
Interact with your team members live.
Step 1: Start with a baseline
It is always better to start with a baseline rather than work on blank templates.
Otherwise, you have to do everything by yourself, like choosing a color from palettes, setting up text width, and fixing design elements at appropriate places.
So, when you work on an already set up template, you cut down your design time to half.
After all, every agency has unique ideas.
Have you framed the design on Figma and thinking about what to do next?
Transfer Figma sketch files to Webflow.
You can create fantastic Webflow agency websites with iterations and refine your ideas rather than starting from scratch.
Step 2. Define your default styles
Some common elements remain the same throughout the design.
But, you can alter them as per your brand requirements. You can set default styles by customizing and restyling them.
There are countless such items like:
Body
Paragraph
Quotations styles
Link colors
Logo placement
Let’s start with Body; select Body(all pages) and choose the typography and size. With the same font styling, it will flow consistently throughout your website.
What’s more, responsive design is also one of the options. It alters the size as per screen size for smartphones and desktops.
Sounds complex? Webflow developers help you with bespoke design by designating suitable body styling.
Further, documentation of custom style helps with working in a team. Select global colors as they are easy to change.
Step 3: Define your Collections
Till now, your agency website’s basic framework is set up on Webflow. Also, you have got your styles ready. But we haven’t reached site design yet. For this, it is important to define your collections.
Let’s dive more into this.
What is a Collection?
The collection is a set of data you can reuse throughout the website. It becomes far easier to use them when it appears on your Webflow agency websites.
When you talk about Authors, you can select relevant fields for authors:
Name
Category
Publish date
Topic
Facebook link
Bio
Here, what’s the best deal for you?
Webflow provides a predefined set for every collection.
But, you can modify it as required. For example, you may not require a Facebook link, but instead of LinkedIn, you can alter this.
Webflow allows you to create fields for different collections like:
Blogs
Articles
Galleries
Authors
Team members
Some advice on setting up Collections
Sometimes, you may not resist making collections too comprehensive. And you may think, let’s keep images and blogs under one collection. But it’s not worth it.
Webflow allows only 30 fields under one collection. And it will mess up everything. So, it is best to keep them separate for better clarity.
Initially, it may be challenging to decide which fields are better. As Webflow facilitates creating dummy content, you can start with the fields that you feel are relevant. Further, modify fields that suit more.
What’s next?
We’ll move on to planning pages, flexboxes, and reusable classes.
Build Your Best Webflow Agency Website in No Time!
Hire Experts. 200+ Webflow Projects Completed.100+ Five star Reviews on Google, Clutch, Goodfirms. 100% Quality Guaranteed.
Webflow Agency Websites Part 2: Planning Pages and Defining Layouts
Are you thinking about breaking the monotony of the blank Webflow page? Divide Webflow agency websites design into small palatable chunks with:
Step 4: Plan your pages
Building wireframes with container and section pieces can give designers an excellent starting boost.
It is like creating a layout by adding a section element to different home pages. Further, give these an ID from the settings tab.
Assign fields to containers, whichever you feel are suitable. With this, you get tangible chunks and gain clarity for further design.
What else?
Define classes to use at several places.
Step 5: Plan your classes
Planning classes are the most critical but essential part of agency website design on Webflow.
It seems interesting to define classes for each and everything. But the reality is that you need to think strategically before deciding on classes.
Why is it so?
It is because of their reusability.
Otherwise, they become too many to handle efficiently.
So, use specific classes to save you from getting into a mess. Here, you may think about many aspects like:
Shall I assign padding to every paragraph?
Can I add a center-alignment class to every heading in the body?
For this, ensure that your Webflow containers lead the element or text, not the other way around.
It will help your agency website have a nice layout and appearance. And create classes that perform only a single task like full padding and right alignment.
When you create classes with these things in mind, it becomes seamless to reuse them:
Not interfere with each other’s functionality.
Use them in combination.
By using proper classes, your agency website becomes 1056x more scalable. Also, you get easier aspects to create your Webflow site.
Next, we’ll illustrate the flexbox’s ability to save time, create logical interactions, and enhance readability with inverted palettes.
Webflow Agency Websites Part 3: The Power of Flexbox, Logical Interactions, and Readability
In this section, you get insights into making your agency website better on Webflow with:
Building layouts with flexbox.
Forming minimal interactions.
Invert the palette for high readability.
Step 6: Harness the power of flexbox
If you’ve worked with flexbox or heard about it from others, it makes your head bump.
It is a lot difficult to understand and learn flexbox.
Thankfully, Webflow has made learning flexbox a lot easier without any other efforts.
Also, if you’re not using flexbox while designing agency websites with Webflow, you’re missing something very crucial.
It makes your website responsive while giving a high performance on mobile and desktop.
To use flexbox, add flex to the collection list and collection item elements, let’s say: design-present item. Further steps:
Adjust display layout settings by using click and drag.
Alter flex items like expanding display and overflow.
What makes flexbox special?
Here, sibling elements know each other. And when you use the hover option for design-present items, it adjusts itself with respect to adjoining elements up to 15%.
The best part is that it doesn’t take up extra screen space and creates a wonderful hover effect.
Well, all this doesn’t happen automatically. Along with the above steps, you must add a transition to the flex property. Also, it is impossible to achieve with interactions on the interaction panel.
Step 7: Design logical interactions that don’t overwhelm users
As we have discussed above, too many classes can overwhelm designers. On the other side, extra interactions on Webflow can clog users’ understanding of the agency website.
So, it is vital to create interactions that have some logic. With this, users can make out how things are happening without confusing them,
What’s the key behind this?
Design interactions for specific purposes.
Use them consistently for the same objective.
Keep their number as minimum as possible.
Along with this, subtleness matters the most. You can’t afford to keep lights high on one part and make other elements completely dull. With this, users may get completely distracted.
In contrast, when you want to bring the user’s attention to a certain part, use a little bit of illumination, and dim the lights on the rest of the parts.
Additionally, the motion effect shouldn’t be that sudden. It can give a horrible website experience.
Here also, subtleness counts.
That is using the ultra-fine back-and-forth effect.
Furthermore, keep these interactions the same for all the pages on Webflow. With this, agency website viewers can make out the message easily.
Okay, let’s talk about the hover effect.
It is not possible to hover without a click. With this, you can miss out on interactive experiences on mobile or touchscreen laptops.
So, you can’t hover as the primary interaction. Limiting hover makes browsing on mobile a lot simpler and more effective.
Step 8: Invert the palette for readability
This part is very significant for agency websites that publish long-form content.
The point is, black text on a white background is friendly for short text. But, it can bore users after certain lines and take them away from your web page.
The first thing is using high-contrast imagery that makes it stand out.
After this, inverting the same colors doesn’t have a significant effect. But using different background color works the best. You can use this only once or twice on a single page.
For this, create a separate class and modify its background color, border, and font color. Definitely, it’s a time saver to use this repeatedly as per color choice every time you want to use this with a separate color.
This can also be used on symbols on the header and footer.
You can use these classes in desired locations without worrying about which colors you have used on other website pages.
Further, we’ll cover the last part so that content creators can finally take the lead.
Want to Build the Best-in-Class Webflow Agency Websites?
We got you covered. Hire from 40+ Professionals and get the website delivered in 1-2 Days.
Webflow Agency Websites Part 4: API Integration and Content Creation
This is the fourth and ending part of creating silky smooth agency websites with Webflow. Here, you’ll come to know about handling API integration and hand over your website to content creators.
Step 9: Use Webflow CMS’s API integration
Technical terms like API may seem to be quite intimidating.
But it’s really not.
Simply, API stands for application programming interface, a software that acts as a mediator for two applications to exchange information. For example: When someone incorporates Google weather API, live weather will show on the website.
Other than this brief introduction, Webflow has covered many aspects about API integration and related concepts.
The API integration can make a lot of difference to your website. It makes live and meaningful data available for the users like maps, social media, breaking news, web search, etc.
To do this, find apps and sites that allow you to receive information. And create collections within Webflow to catch desired information. Basically, you need to paste code snippets with links to those apps and sites.
Besides this, there is one delivery person: Zapier. Let’s discover more about it.
Setting up Zapier
Zapier combines 2 APIs together. Above that, Webflow CMS makes Zapier automation even stronger.
Once it’s done, make a zap by typing the target app. Further, choose the desired triggers from the available list.
After authentication, finally, your APIs are good to go.
But wait, testing the setup is still left. Many things can go wrong in between. Once done right, Webflow will display ‘the test successful.’
Step 10: Call your favorite content creators
Now, you’re ready with your full-fledged agency websites. You’re done with creating frameworks, styling, classes, and interactions.
Next, it’s time to fill in the relevant content. For this, full-time content creators or freelancers are available. Otherwise, one from within your team can also handle this role. This all depends on what your goals and requirements.
To hand over your content to editors smoothly, refer to the Webflow guide.
It just involves creating your account and following the mentioned steps. That happens quickly.
Yes, you can publish your agency website with valuable content.
Final Thoughts: Webflow Agency Websites
Having your own agency website ready is always a relieving experience. It is especially with Webflow, which makes website design super easy while creating responsive and dynamic websites with the industry’s latest designs.
We have included everything about building agency websites with Webflow in the above blog. But, some agencies could have less time to learn things like flexbox and API integration. Alternatively, you may get stuck in between; Webflow agency ease your designing issues seamlessly.
Build Webflow Websites at 50% Less
Experts in Custom Webflow Websites, Online Stores, Landing Pages, Integrations and More.
Gourav Khanna is the Co-founder and CEO of APPWRK, leading the company’s vision to deliver AI-first, scalable digital solutions for enterprises and high-growth startups. With over 16 years of leadership in technology, he is known for driving digital transformation strategies that connect business ambition with outcome-focused execution across healthcare, retail, logistics, and enterprise operations.
Recognized as a strategic industry voice, Gourav brings deep expertise in product strategy, AI adoption, and platform engineering. Through his insights, he helps decision-makers prioritize market traction, operational efficiency, and long-term ROI while building resilient, user-centric digital systems.